Transferring ownership of a contract
How to transfer ownership of a contract, update permissions, and add the contract to your dashboard
thirdweb’s tools are built for teams and are designed for you to easily modify permissions regarding who can perform functions on a contract. One common use case is transferring a contract entirely to another wallet. Perhaps your mint was even more successful than you imagined and you want to transfer ownership to a multi-sig or cold wallet, or you sold your contract rights to another individual/team, here is how you can properly update contract permissions to achieve this goal.
Where you are transferring away or receiving ownership of a contract, this article is for you.
Transferring away ownership of a contract
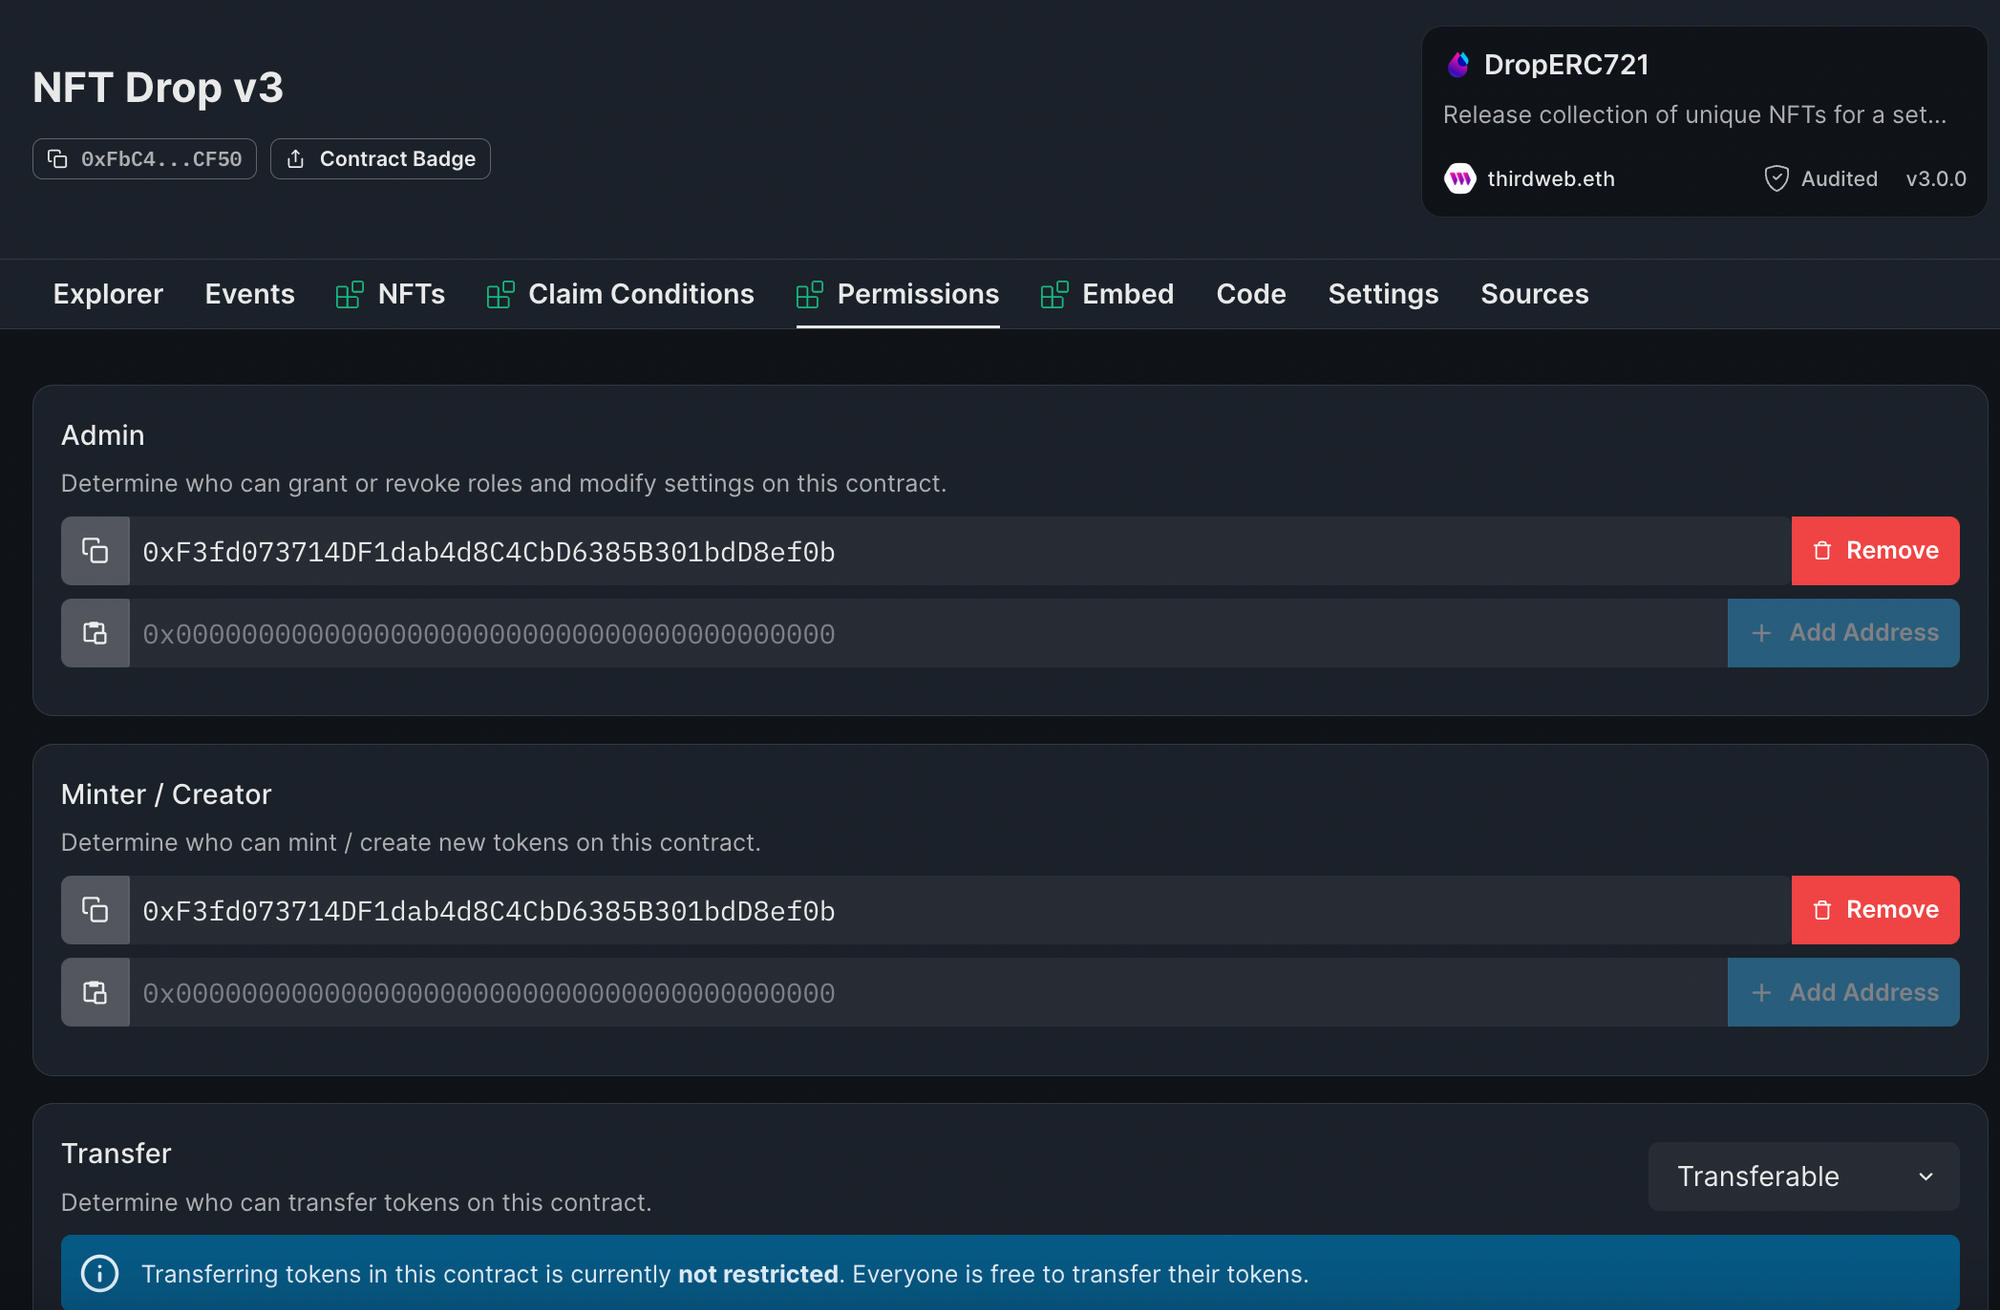
First, head to the permissions tab on your contract on the dashboard. We’ll use an NFT Drop contract as an example:

First, you can remove your wallet from all permissions fields, while also adding in the new wallet set to become the owner. Select “update permissions” and confirm the transaction.
From this point forward, only the new wallet will be able to perform admin & minter functions on the contract (like adding nfts, changing royalty settings, etc).
Receiving ownership of a contract
After your wallet has been given admin permission on the contract, you can connect to the dashboard with this wallet and you’ll be able to complete the process of transferring ownership.
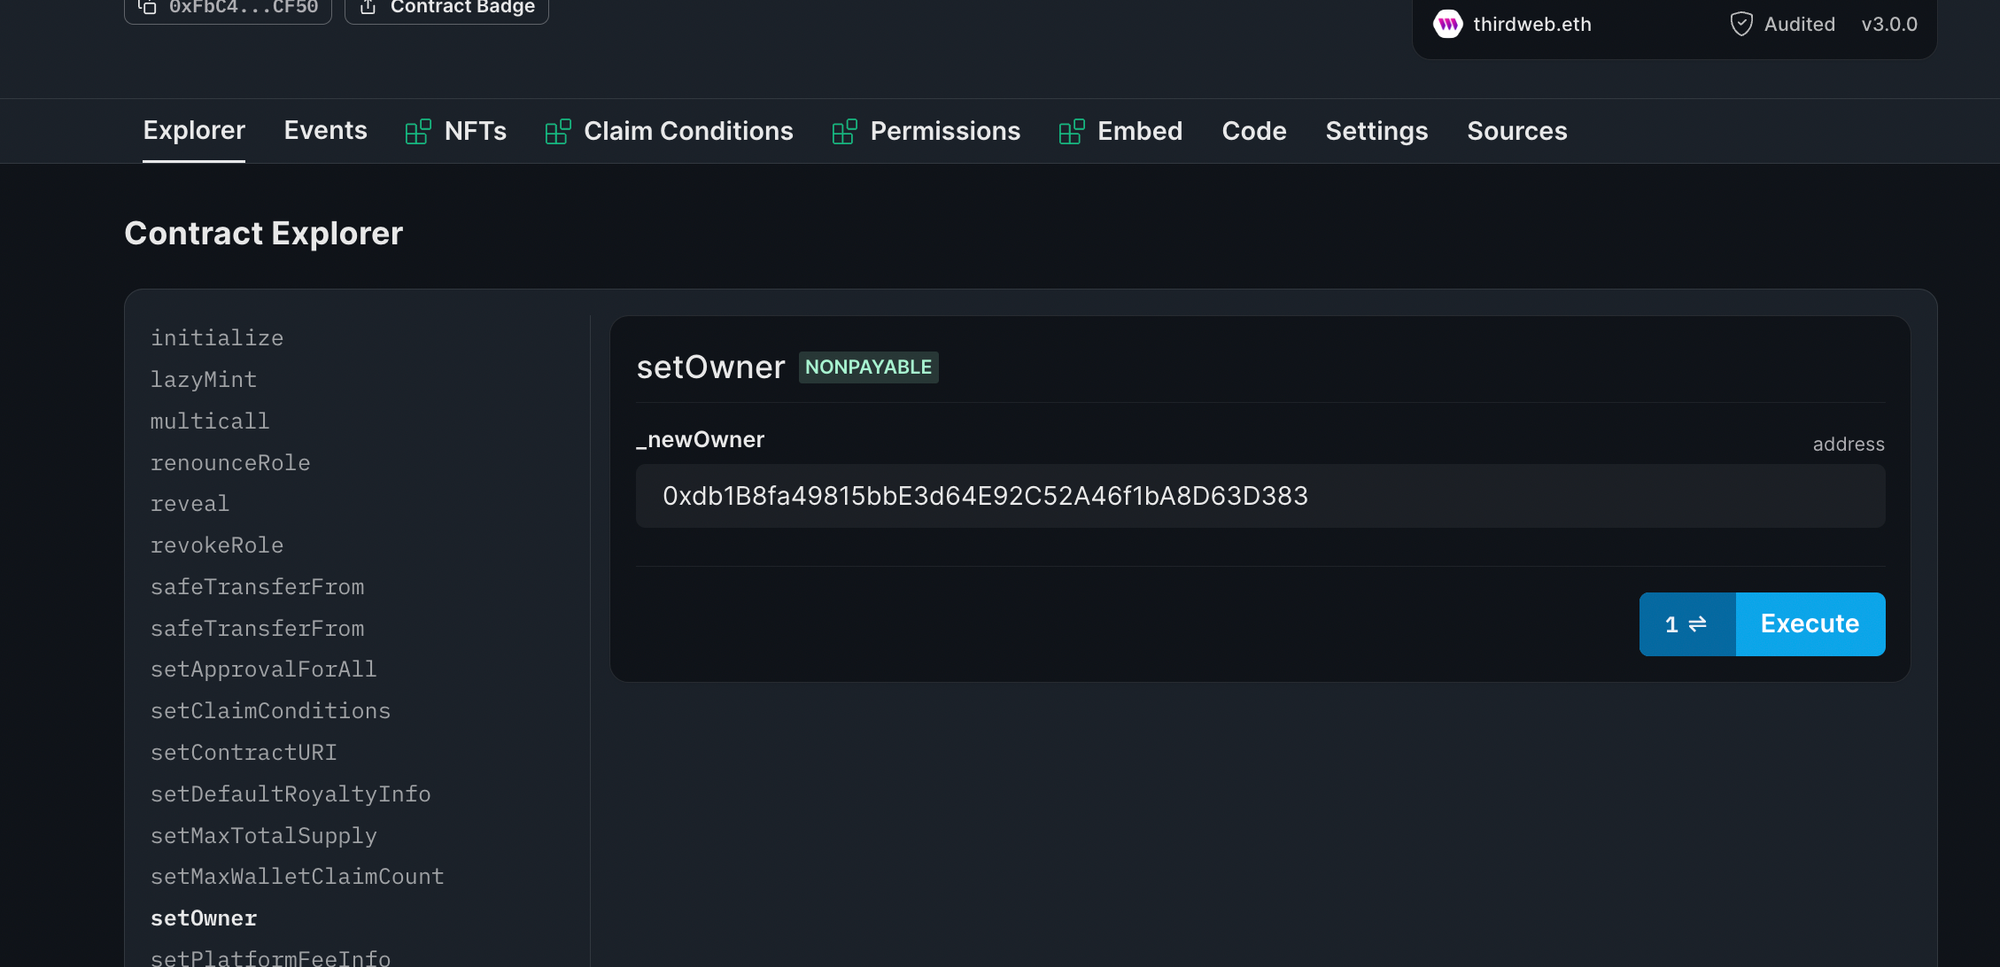
First, navigate to the contract explorer and find the setOwner function. Enter your wallet address here and select “Execute”.

After confirming this transaction, you are the new owner of the contract and you have admin control. 🎉
Adding the contract to your dashboard
One final step is needed to add the newly transferred contract to your dashboard. In the Settings tab, scroll all the way to the bottom and select “Add to dashboard”. After confirming this transaction, the contract will appear on your dashboard at thirdweb.com/dashboard so you can easily refer back to the contract any time you are connected to the site.

That’s all!
Can’t get this working? If you’ve followed the above and still have issues, contact our support team for help.